10 Street Photography tips in 10 Days
Tip #1 Must be Quick
First rule of street photography: you must be quick, both visually and technically. Wasting time fiddling around with dials and displays is not an option. Understand the characteristics and nuances of light and adjust impulsively without fumbling with the camera is key to create the message or mood you want to communicate. In other words, the first step in effective street photography is to learn to see the image before putting the camera to your eye and get to know your equipment well enough so you can grab the moment quickly. Things can happen very fast on the street and often there are no second chances or “take two’s”. In other words... It get better with practice.
Tip #2 Camera settings for street photography
An important part of the composition is he background, it carries the story. Sharp focus on all the elements will emphasize the depth of the scene, shooting at an aperture of f/8 or higher is an appropriate choice, yet there are always exceptions to the rule as elements and moments move fast. Therefore, working with a high shutter speed like 1/250 will be major beneficial to freeze the action.
The drawback from the aperture and shutter levels being high will diminish the light intake, so you may have to up your ISO.
Portrait photography being my roots, I’m a totally attracted and embrace natural light and shallow depth-of-field. It is not in my wheelhouse for me to pass f/8 (except when I’m doing landscapes or architecture). But understand that one of the characteristics of Street Photography is that flaws, such as motion blur, are acceptable if it does not compete with the visual direction or takes away the impact of the message.
Tip #3 Ditch the long tele zoom and use a wide-angle:
"Robert Capa once said; 'If your pictures aren't good enough, you are not close enough." And I couldn't agree more.
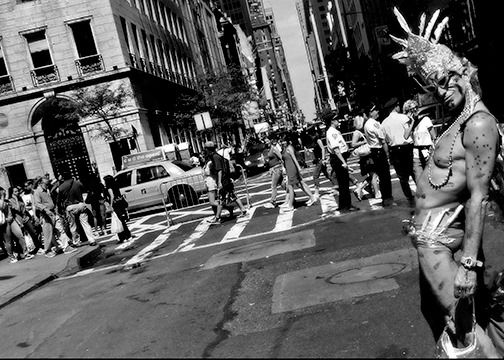
Photographers who are new to street photography often assume that a long telephoto lens is the way to go, but this isn’t the case. A long telephoto lens removes you from the story you’re trying to tell while a wider lens places you among the action while remaining inconspicuous.
Street photography is very fast and personal. it’s about experiencing and connecting with life, up-close and in the moment. When starting your street photography journey, you may be tempted to use your biggest zoom lens to feel less “conspicuous” and hidden. Instead, it will do the exact opposite and do much more harm than good. Mostly, it will eliminate the creative intimacy of street photography.
Get close enough that when you are taking photos of people on the street you can hear the conversation and feel the pulse and energy of the situation developing in front of you, in other words, become part of the scenario… feel it. I recommend using either a 24, 28, or 35 mm.
Tip #4 Notice light
Wherever there is light, one can photograph.” – Alfred Stieglitz
I find that today, many are more captivated and spend countless hours researching and talking about the difference between zoom lenses vs prime lenses, full frame vs mirrorless, Photoshop vs Lightroom than actually learning the “meaning” of photography itself.
The first step to becoming a photographer is to develop a profound understanding of light; how it works and how to capture it, control it, enhance it and use it creatively. Its in the word… “photography” means “to paint with light” and the latest camera body is not going to do that for you.
For me light is key when making a photo and is a photograph's main ingredient, it really is the one reason an image can happen. Light conveys feelings, mood, atmosphere.
Unlike landscape photography, a benefit of street photography is that you don’t need to get up at the crack of dawn to get the right light. Shade, overcast, sunlight, nighttime and rainy days are some of the most hoped-for conditions on the streets. The thing is to adapt and use the light that is offered to your advantage.
Street photography will challenge your observation skills and train your eye to see how light shapes the scene and guide you to intuitively know where to place yourself to accomplish the desired composition.
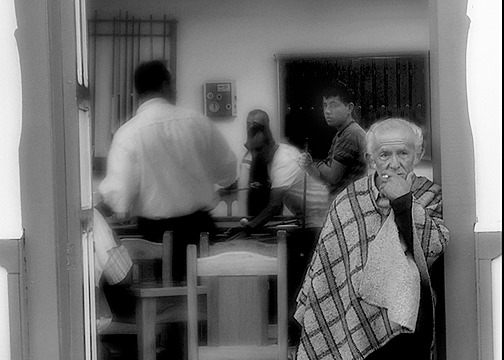
Any time during the day or night, be alert to the type and amount of light and be aware of the light sources falling on your subjects and background. Understanding and working with light will take your images to a whole new place.
Tip #5 Look for opposites: Juxtaposition tells its own story
“All the technique in the world doesn’t compensate for the inability to notice.” – Elliott Erwitt
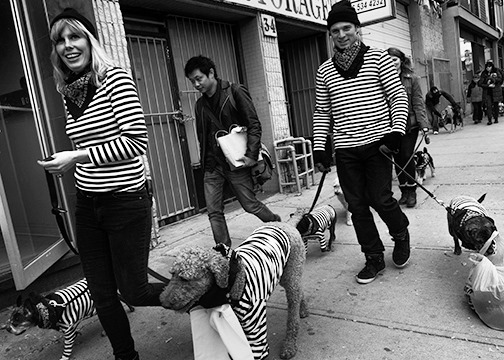
I really love this side of street photography when it happens. One of the wonderful things about shooting in an urban setting is the multitude of comparisons you can discover. Architecture and humankind, old and young, tall and short, progress and deterioration, the opportunities are never-ending.
Looking for situations with interesting messages that seem to be opposite to the people that are the subject of your composition can be a challenge but will refine your ability to see and react. Look for two or more individuals that seem to be differing in height, gender, complexion, age, fitness or even weight.
Noticing these variances and framing them to highlight those differences is the art of juxtaposition. It’s a challenge, but a terrific way to create impact and dialog to your photos. Go for it on your next outing, in time you will be surprised at what you will see.
Tip #6 Timing and Anticipation
“It is an illusion that photos are made with the camera… they are made with the eye, heart and head.” – Henri Cartier-Bresson
In street photography, timing and anticipation is the name of the game and when we intuitively feel time is right to press the shutter. Street photography is the immediate recognition of the meaning of an occurrence and of seizing that moment.
Often described as “The decisive moment”, (a term coined by influential photographer Henri Cartier-Bresson), it initially involves simultaneously seeing and capturing in a fraction of a second the moment. Hesitate and the moment vanishes, lost forever.
In street photography, one cannot depend on on being reactive. To “react” will usually cause you to miss the moment; to “anticipate” is to seriously increase your chances for a meaningful image. This to say, when it comes down to it, street photography is not a pursuit to recognize, it is one to anticipate.
Make your own decisive moment by observing, being alert and ready. What kind of emotion are you trying to convey; love, happiness, sadness, melancholic, hurried? Does your image captivate the viewer and make them feel that they are a part of the scene? Ask yourself these questions the next time you are taking photos on the street, it will certainly change your approach and guide you to the visual message.
Tip #7 Attempt Street Portraits
Richard Avedon said, "a photographic portrait is a picture of someone who knows he is being photographed."
With that statement, a street portrait is a "a picture of a complete stranger who knows he/she is being photographed."
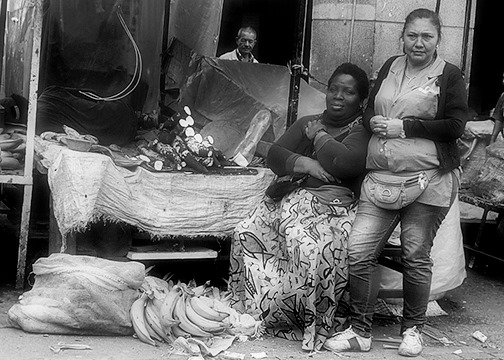
In this case, it’s a photograph of a total stranger you encounter on the streets, he/she knows about it and is also involved in the process. It can be a close-up or a full length.
Many street photographers have chosen the word portrait to label candid pictures of people. I prefer the word “candid portraits” as for me a portrait is very much a different creative process.
If you are new at Street Photography and nervous about trying it, an effective way to get comfortable is to create some street candid portraits. This will get you into it and and will help you relax while getting used to photographing people.
Approach some people, tell to them that you’re doing a photography project and think they would make a great subject (flattery does go a long way). Once they give you the OK, take your time and do your best to take a good photograph of them. Frame them properly, notice the background and most important, really try to bring out their character. It will be a very rewarding effort for both you and your subject.
Have a conversation with the person while photographing and make eye contact, it will go a very long way for your image and shoot lots.
One thing most people do that is really distracting and takes away the mood of the person is to constantly review the photo on the back of the camera, it’s an actual term photographers refer to called “chimping”. If you constantly “chimp” It sends the message to the person in front of your camera that you are not sure of what you are doing, it breaks the momentum of connecting with your subject and makes them feel more insecure of being in front of your lens.
Finally, I think is a good practice to always offer to email them photos, so have a note pad and pen with you.
Tip #8 Think About Composition
Storytelling is the entire point of street photography and if it has nothing to say or communicate, it’s a snap, not a photograph. But it will not always offer you ample time to compose a photo as things happen fast and without warning, but it is still very important to design your composition and determine where you’re going to position your subjects.
A guideline to follow is to not always put someone dead center of the frame. You can fluctuate the composition by applying the rule of thirds or to shoot horizontal then vertical if time or situation allows. The goal for this type of photography is to engage your viewers by leading the eye to look at your photos and pay attention to your subject, as well their environment.
The streets, are jam-packed with all types of elements: people, buildings, cars, billboards, signs, etc. Your task is to remove as many insignificant elements out of your frame as possible and bring visual attention to your subject. Like, a book there are specific writing rules or structures, for example, it should have a plot and narrative. The same applies in photography because strong compositions tells a story and inspires the viewer to examine or study the image.
You need a subject, a context and a design to form your visual narrative, this will produce visual harmony and flow, in other words… it engages. A trick I use when I am out in the streets is that I concentrate to lessen or remove confusing elements by looking for “ONE’S - 1 subject, 1 couple or 1 group of individuals. It helps to simplify the narrative and guides you to remove distracting and insignificant elements (visual noise) that are not part of the story or composition.
Tip #9 Take It Inside
A friend once told me that she was going to attend a street photography educational tour in Montreal and because it was raining, it got cancelled. In Montreal with all the subway’s, shopping places, markets, and more, I was speechless.
During foul weather or colder seasons photographing indoor can be a comfortable retreat for street photographers’, indoor markets, shopping centers, subways and similar places can be great settings for visual storytelling and offer many exceptional street photo opportunities.
Prepare for challenging lighting conditions and the important thing to understand is that you are on private property once inside any building or subway and everybody has an opinion on what’s legal and what’s not. This is when being a discreet shooter comes into play. Some businesses discourage cameras therefore always respect those boundaries and go out of your way to be more unnoticeable, it will go a long way and keep you out of trouble. One small camera body with a small lens, no tripod, no camera bags, no gadgets dangling from around your neck. Just you and a camera. The key word is “inconspicuous”.
Walking around in a mall or subway with the biggest camera body you own with a battery pack and a 100-400 2.8 lens will NOT make you look like a photographer; it will only get you booted out of there in a hurry.
Interior street photography is a great substitute to the outdoors, to develop your eye, shoot fast and hone in your technical skills. Getting in the practice of looking for images in interior surroundings will keep you more creative, and it will allow you to refine your street photography skills more efficiently than if you were you to restrict yourself to the outdoors.
Indoor street photography offers some challenges, the greatest is that interior lighting is often much weaker than outside. You will more than likely have to increase your “ISO” setting. With a fast lens (1.8 / 2.8) I usually do OK at ISO 400/500, sometimes you may need more. Also, because of the many variety of light sources found in malls, subways, etc., setting your “white balance” to AWB will be a benefit and assure the best balance possible, unless you're shooting B&W.
Tip #10 Don’t Contemplate… Feel, then Shoot.
“Seeing is not enough; you have to feel what you photograph.” - André Kertesz
Capture a moment, an expression, a smile or a sentiment. When I go out to photograph, I don’t have a strategy, I let the street talk to me and follow my heart. This is why street photography is so special to me. Although composition, exposure, light, etc., are all significant in the creation of your imagery and what surpasses all of that, is trusting our heart to press the shutter button to make more emotional photographs.
Photographing in the streets starts to happen when you can push aside the technical and equipment paraphernalia aside and just feel the pulse of the scene you are part of, and every one has some rhythm, whether it’s a city, town or village.
The goal is to become good and confident enough with your camera and the settings that you can put yourself on “autopilot” and simply absorb, letting the sounds, scents, energy and visuals embrace you, then get you in the zone to translate that into something worth shooting and express the true feeling you had while there.
Believe in the process and let it flow. Eventually, you might find these images, perhaps with some slight flaws or imperfections, could become your most treasured.
Learn to trust your skills and maintain your rhythm. You’ll miss fewer shots and stay better connected to the scene. Find your mistakes later and learn from them.


